Finding a willing guinea pig scanned, printed and painted.


Print is about 50mm. Printing it bigger improves the detail.
Finding a willing guinea pig scanned, printed and painted.
Print is about 50mm. Printing it bigger improves the detail.
Before I got the scanner I downloaded some of the scans from EdSciFest on Thingiverse to see what the quality of the print was like and if they could be painted (or at least if I was any good at painting them)
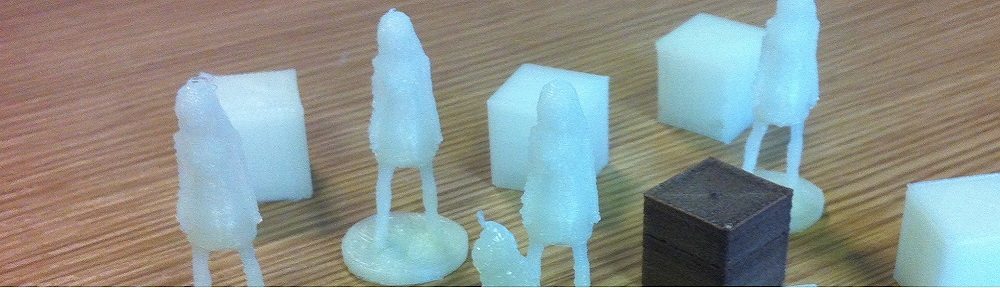
I chose this scan as it seem to have good features that would print ok and it gave me enough clues as to what the woman actually looked like originally.

http://www.thingiverse.com/thing:296698
Printed out looks like this

You have to be a bit careful and think about your print before you start in regards to horizontal areas that don’t have anything underneath them. I didn’t get this quite right here as her nose didn’t print.
You can see this clearer here after I added paint.

I also had no brushes and applied the paint with a piece of sponge giving her a rather odd expression. I improved a bit after I bought some brushes.

This

Cubify Sense 3D scanner.
http://www.cubify.com/en/Products/Sense
I was doing some work for the Edinburgh Science Festival and got a shot of one to play with. Its pretty good and there really isn’t anything else on the market at this price.
So here it is mounted on the printer

I can print the model at 3x the usual print speed with the fan running
Here is the model after a print at 70mm/s

You can see that the right hand side is good but the left is a bit wobbly as its shielded from the air flow a bit.
Just to show, this is the same model at 70mm/s without the fan running.

The printer in in its standard form I have found is quite slow. Anything above 30mm/s and the print is horribly distorted. As far as I could see this is because its trying to put down plastic on to plastic which is still soft and the print head drags the already laid down material with it. So I have been itching to try a cooling fan assembly to blow cold air over the job and hence the print head will be laying down new plastic on to something which is solid. However I have not been able to find anything premade that will simply bolt on to my early RepRapPro Mendel x-carriage. Everyone seems to be using some variation of Prusa now with exciting new style hot-ends. Until I found this to see if it would be close :-
http://www.thingiverse.com/thing:252706/#files

(the v3 version for 30mm fans)
I really printed it out to measure from but as it turned out it just needed a thin piece to attach it to the print carriage and a 30mm fan from a switch I had. Connect this to the FAN output from the Melzi control board and it will come on when printing starts or at some preset height above the print job. I have it set to .5mm so that it does not cool the job as its trying to stick it to the bed and cause it to warp.
In action in the next post.